
Introduction to podcast equipment
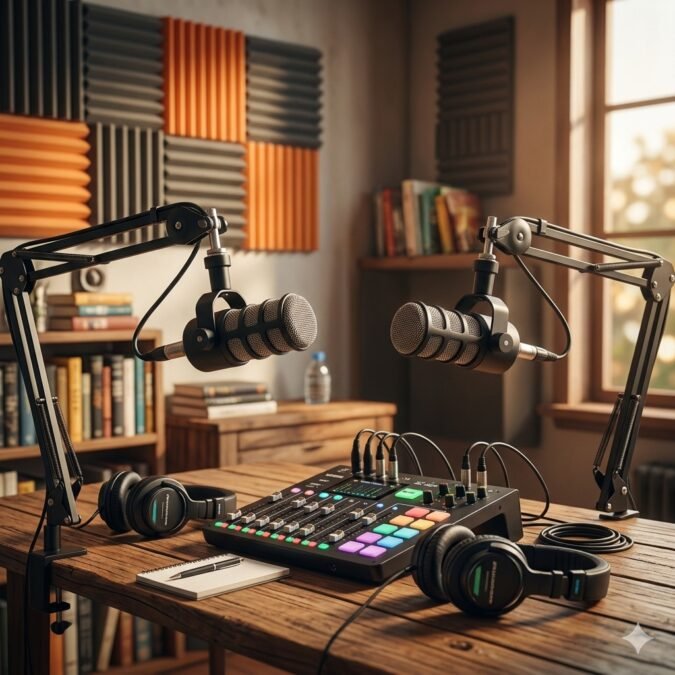
podcast equipment is the collection of tools used to record, edit, improve, and publish a podcast. It can include microphones, headphones, audio interfaces, mixers, microphone stands, cables, recording software, computers, acoustic treatment, and other useful accessories.
Starting a podcast might seem complicated at first. There are many products on the market, and each one appears to have a different purpose. But don’t worry! You don’t need an expensive studio to create clear and enjoyable audio. A beginner can start with a simple setup and upgrade gradually as experience grows.
The most important goal is clear, consistent sound. A listener may forgive a simple background, but poor audio can make even an excellent podcast difficult to enjoy. Therefore, choosing the right podcast equipment should begin with understanding what each tool does and how it fits into the recording process.
This guide explains the main equipment categories, how they work together, what beginners should consider, and how to build a practical podcast studio without unnecessary spending.
Why podcast equipment matters
Good audio helps a podcast sound professional and comfortable to listen to. When voices are clear, listeners can focus on the conversation instead of distractions such as buzzing, echoes, background noise, or uneven volume.
Quality podcast equipment can help with several important tasks:
- Capturing clear voices
- Reducing unwanted background sounds
- Monitoring recordings while they happen
- Connecting microphones to computers
- Recording multiple speakers
- Improving sound consistency
- Making editing easier
- Creating a more reliable production workflow
However, expensive equipment isn’t automatically better for every creator. A $500 microphone won’t fix a noisy room, poor microphone placement, or weak recording technique. In fact, a modest microphone in a quiet, well-managed room can produce impressive results.
The best approach is to understand the purpose of each piece of equipment before buying it.
The microphone is the heart of podcast equipment
Among all pieces of podcast equipment, the microphone is usually the first major investment. It captures the speaker’s voice and converts sound waves into an electrical or digital signal.
There are two common microphone types that podcasters should understand: dynamic and condenser microphones.
Dynamic microphones
Dynamic microphones are popular for spoken-word recording because they’re generally durable and can reject some unwanted room sound.
They’re often useful in:
- Home studios
- Rooms with background noise
- Interview setups
- Live podcast environments
- Multi-person recording spaces
A dynamic microphone usually works best when the speaker stays relatively close to it.
Condenser microphones
Condenser microphones are known for sensitivity and detail. They can capture subtle characteristics of a voice, which can be useful in a controlled recording environment.
However, that sensitivity can also pick up more room noise, computer fans, air conditioners, and reflections.
For a quiet studio, a condenser microphone can be an excellent option. For a less controlled room, a dynamic microphone may be easier to manage.
USB and XLR microphones
Another important choice involves the microphone connection.
USB microphones
USB microphones connect directly to a computer or compatible device. They’re convenient because the microphone contains much of the electronics needed to convert the sound for digital recording.
Advantages include:
- Simple setup
- Fewer cables
- Beginner-friendly operation
- Usually no separate audio interface required
- Convenient for solo podcasters
For someone recording a first podcast, USB can be a very practical starting point.
XLR microphones
XLR microphones use professional audio connections and generally connect to an audio interface or mixer.
Benefits can include:
- Flexible studio setups
- Better options for multiple microphones
- Professional signal routing
- Compatibility with many audio interfaces
- Easy integration into larger recording systems
XLR systems can take more time to learn, but they provide flexibility as a podcast grows.
Choosing the right podcast equipment for your room
Before buying equipment, look around the room where you’ll record.
Room acoustics can have a surprisingly large effect on the final recording. Hard walls, windows, bare floors, and empty furniture can reflect sound. These reflections can create an echo that makes speech sound distant or harsh.
A room with curtains, carpets, bookshelves, furniture, and other soft or irregular surfaces may naturally reduce some reflections.
When choosing podcast equipment, remember that your environment is part of your recording system.
A simple microphone in a well-managed room can sometimes sound better than expensive equipment used in a large, echo-filled space.
Headphones are essential podcast equipment
Headphones allow you to hear what your microphone is actually recording.
Without headphones, a podcaster might not notice:
- Background buzzing
- Clothing noise
- Microphone bumps
- Distortion
- Excessive volume
- Room noise
- Electrical interference
Closed-back headphones are commonly useful for recording because they reduce the amount of sound escaping from the headphones into the microphone.
Comfort also matters. Podcast sessions can last an hour or more, so headphones that become uncomfortable after twenty minutes aren’t exactly a dream setup.
When shopping for headphones, focus on comfort, durability, and clear monitoring rather than simply choosing the most expensive model.
Audio interfaces explained
An audio interface is an important part of podcast equipment when you’re using XLR microphones.
Its basic job is to connect microphones and other audio sources to a computer while converting analog audio into digital information.
Many interfaces also provide:
- Microphone preamps
- Headphone outputs
- Volume controls
- Phantom power for compatible condenser microphones
- Multiple input channels
- Monitoring functions
For a solo podcast, one or two microphone inputs may be enough. A podcast with several speakers may require an interface with more inputs.
When selecting an interface, think about your current needs and possible future expansion.
What is phantom power?
Phantom power is an electrical power supply commonly used with condenser microphones.
It’s often labeled 48V on an audio interface or mixer.
Not every microphone requires phantom power. Many dynamic microphones don’t need it, while numerous condenser microphones do.
This is why it’s important to check the manufacturer’s specifications before activating power.
Understanding small technical details like this can prevent setup mistakes and help creators use their podcast equipment safely and correctly.
Microphone stands and boom arms
Holding a microphone in your hand while recording isn’t ideal. Movement can create unwanted noise and make microphone distance inconsistent.
A microphone stand keeps the microphone stable.
A boom arm can provide even more flexibility because it allows the microphone to be positioned close to the speaker without placing a large stand directly on the desk.
Useful features include:
- Strong construction
- Adjustable height
- Flexible positioning
- Stable mounting
- Cable management
A shock mount can also help reduce vibrations that travel through a desk or stand.
Pop filters and windscreens
Speech contains certain sounds that can create sudden bursts of air. These are often called plosive sounds.
Words containing strong “P” and “B” sounds can produce these bursts. If the microphone is positioned too close, the recording may contain a noticeable popping sound.
A pop filter can help reduce this problem.
A foam windscreen can also provide some protection against airflow and breath noise.
These accessories aren’t necessarily expensive, but they can make a noticeable difference in certain recording situations.
Cables and connections
Cables are easy to overlook when building podcast equipment, but they’re essential.
An XLR microphone needs a suitable XLR cable. USB microphones require an appropriate USB cable, depending on the connector used by the device.
A good setup should also avoid unnecessary cable clutter.
Poor-quality or damaged cables can cause:
- Crackling
- Intermittent sound
- Humming
- Signal loss
- Connection problems
You don’t need the most expensive cable available. A properly made, reliable cable is usually more important than flashy marketing claims.
Podcast mixers
A mixer allows multiple audio sources to be combined and controlled.
A mixer can be useful when a podcast includes:
- Several hosts
- Multiple microphones
- Remote audio
- Music
- Sound effects
- Other audio sources
Mixers can offer physical controls for microphone levels, headphone monitoring, and other functions.
For a simple one-person podcast, a mixer may be unnecessary. In a more advanced studio, however, it can become a valuable part of the workflow.
The key is to buy based on actual needs rather than assuming that more controls automatically mean better results.
Recording software
Hardware is only one side of podcast equipment. Recording software is equally important.
Audio software allows creators to record, edit, arrange, process, and export episodes.
Depending on the program, creators may be able to:
- Cut unwanted sections
- Remove mistakes
- Adjust volume
- Reduce some background noise
- Add music
- Insert sound effects
- Apply equalization
- Compress voice recordings
- Export audio files
Beginners don’t necessarily need advanced professional software. A simple editor can provide enough tools to produce an excellent first podcast.
As skills improve, creators can learn more advanced editing techniques.
Computers and storage
A computer is often the central hub of a podcast studio.
The computer needs enough processing power and storage for recording and editing audio. Audio files can take up significant space when a creator keeps raw recordings, edited sessions, backup copies, music, sound effects, and exported episodes.
A practical workflow includes regular backups.
Important recordings can be stored in more than one location, such as:
- An internal drive
- External storage
- A trusted cloud-storage service
Losing a two-hour interview because of a drive failure is a lesson nobody wants to learn the hard way.
Acoustic treatment and sound control
Acoustic treatment is one of the most misunderstood parts of podcast equipment.
The goal isn’t necessarily to make a room completely silent. Instead, acoustic treatment can help control reflections and improve the sound of the room.
Common options include:
- Acoustic panels
- Thick curtains
- Rugs
- Soft furniture
- Bookshelves
- Portable vocal booths
- Bass-control products for more advanced rooms
It’s important to distinguish acoustic treatment from soundproofing.
Acoustic treatment
Acoustic treatment controls sound behavior inside a room.
Soundproofing
Soundproofing attempts to reduce sound entering or leaving a room.
These are different goals. A few foam panels won’t suddenly stop traffic noise from entering your house.
Portable podcast equipment
Some creators don’t record in a permanent studio. They may travel for interviews, record at events, or move between different rooms.
Portable podcast equipment can include:
- Compact microphones
- Portable recorders
- Closed-back headphones
- Small microphone stands
- Short cables
- Protective cases
- Spare batteries
- Memory cards
Portability requires careful planning. Always test the setup before an important recording.
Carrying backup batteries and storage media can be especially helpful when recording away from home.
Podcast equipment for interviews
Interview podcasts may require a different setup from solo shows.
For an in-person interview, each speaker may need an individual microphone. The recording device or interface should have enough inputs for everyone.
A basic interview setup might contain:
| Equipment | Purpose |
|---|---|
| Two microphones | Captures both speakers |
| Audio interface | Connects microphones |
| Headphones | Monitors audio |
| Microphone stands | Keeps microphones stable |
| XLR cables | Connects microphones |
| Computer or recorder | Stores the recording |
| Recording software | Captures and edits audio |
Remote interviews introduce additional challenges because internet connections can affect audio quality.
Some creators record separate audio tracks locally when possible, which can provide better editing flexibility.
Podcast equipment for beginners
A beginner shouldn’t feel pressured to purchase an entire studio immediately.
A simple starting setup can include:
- One good USB microphone
- Closed-back headphones
- A computer
- Recording software
- A stable microphone stand
That’s enough to learn the fundamentals.
Once you understand microphone positioning, recording levels, editing, and publishing, you can decide what needs improvement.
Maybe you need a better microphone. Maybe the room needs acoustic treatment. Perhaps you want to interview guests and need additional inputs.
Upgrade based on the problem you’re actually trying to solve.
Building a professional podcast studio
Creators who produce podcasts regularly may eventually want a more advanced studio.
A professional-oriented setup can include:
- Multiple XLR microphones
- Audio interface
- Studio headphones
- Boom arms
- Shock mounts
- Pop filters
- Acoustic treatment
- Dedicated computer
- External storage
- Backup system
- Advanced recording and editing software
- Monitoring equipment
However, professionalism isn’t determined by the number of gadgets on a desk.
A professional workflow is also about preparation, consistency, good communication, careful editing, file management, and reliable publishing.
Common mistakes when buying podcast equipment
New creators often make similar mistakes.
Buying too much too soon
It’s tempting to purchase every accessory available. But unused equipment can become expensive clutter.
Ignoring the room
A microphone can’t completely solve severe echo or background noise.
Choosing equipment only by price
Expensive doesn’t always mean suitable.
Forgetting headphones
Monitoring is essential for identifying recording problems.
Not testing before recording
Always make a short test recording before an important interview or episode.
Neglecting backups
A recording that exists in only one place is vulnerable to accidental loss.
Avoiding these mistakes can save money, time, and frustration.
How to improve your podcast audio
You don’t always need new podcast equipment to improve sound.
Try improving your technique first.
Keep the microphone at a consistent distance. Speak naturally instead of shouting into it. Avoid touching the desk during recording. Turn off unnecessary fans and noisy devices when possible.
Record a short test and listen carefully.
Ask yourself:
- Is the voice clear?
- Is the volume consistent?
- Is there an echo?
- Is background noise distracting?
- Is the microphone too close?
- Are there unwanted bumps or clicks?
Small changes can produce surprisingly large improvements.
Creating a budget-friendly podcast setup
A budget setup should focus on essentials rather than appearance.
Start with a reliable microphone and headphones. Use a quiet room and learn basic recording techniques.
Then, gradually add equipment as your needs change.
For example:
Starting stage: USB microphone + headphones + computer
Growing stage: Better microphone + boom arm + acoustic treatment
Advanced stage: XLR microphones + audio interface + multiple inputs + improved room treatment
This gradual approach allows creators to develop skills alongside their equipment.
Maintaining podcast equipment
Taking care of your equipment can extend its useful life.
Keep microphones covered when they’re not being used. Store cables carefully instead of bending them sharply. Keep liquids away from electronic equipment.
Clean headphones and microphones according to the manufacturer’s recommendations.
Before each important recording, check:
- Microphone connection
- Cable condition
- Storage space
- Recording software
- Headphone output
- Input levels
- Power supply
- Backup storage
A five-minute check can prevent a frustrating recording session.
The future of podcast equipment
Podcast technology continues to evolve. Equipment is becoming smaller, more portable, and easier to use.
Modern creators can record surprisingly high-quality audio using compact devices. Software is also becoming more capable, with tools that can simplify editing and audio processing.
Artificial intelligence may continue to influence podcast production through transcription, noise reduction, editing assistance, and workflow automation.
Still, the fundamental principles won’t disappear. Good microphone technique, suitable recording environments, careful monitoring, and thoughtful storytelling will remain important.
Technology can make production easier, but it can’t replace a good idea or a compelling conversation.
Final thoughts on podcast equipment
Building a podcast studio doesn’t have to be overwhelming. The world of podcast equipment contains countless microphones, interfaces, headphones, stands, software programs, and accessories, but beginners can start with only a few essential tools.
The microphone, room, recording software, and monitoring system are particularly important. From there, creators can add equipment according to their needs.
Most importantly, don’t confuse expensive gear with professional results. Skill, preparation, microphone technique, room control, editing, and consistent practice all matter.
Start simply, learn how your equipment works, and upgrade when a real limitation appears. With the right approach, podcast equipment can help turn a basic recording idea into a clear, engaging, and enjoyable listening experience.
Podcast Equipment: Advanced Setup, Recording Tips, and Production Guide
Understanding podcast equipment at a deeper level
Choosing podcast equipment is only the beginning of creating a successful audio program. Once the basic setup is ready, creators need to understand how the different components work together.
A microphone captures the speaker’s voice. The interface or recorder manages the audio signal. Headphones allow the creator to monitor the recording, while software handles editing and production. Meanwhile, the recording room influences how natural or professional the final sound feels.
Think of the entire setup as a chain. If one important part is weak, it can affect the finished recording. For example, a high-quality microphone won’t necessarily sound excellent if it’s placed too far away or used in a room with strong echoes.
That’s why experience matters. The goal isn’t simply to own more equipment. The goal is to understand how each piece contributes to the final result.
Podcast equipment for different types of podcasts
Not every podcast needs the same setup. The equipment requirements depend heavily on the show’s format.
Solo podcasts
A solo creator can keep the setup simple. One microphone, headphones, a computer, and recording software may be enough.
This format is often easier because there are fewer audio sources to manage.
Interview podcasts
Interview shows usually require two or more microphones for in-person conversations. An audio interface with multiple inputs can make the process easier.
Video podcasts
Video podcasts need both audio and video equipment. In addition to microphones and headphones, creators may need cameras, lighting, tripods, and video-editing software.
Outdoor podcasts
Outdoor recording requires portable equipment and careful attention to wind and environmental noise.
Panel podcasts
Shows with several guests require more input channels, microphones, headphones, and careful audio management.
Understanding your format before purchasing podcast equipment can prevent unnecessary spending.
Choosing a microphone based on your voice
A microphone isn’t simply “good” or “bad.” Different microphones can emphasize different characteristics of a person’s voice.
A deep voice may benefit from a microphone that keeps low frequencies controlled. A bright or higher-pitched voice may sound different through a microphone with a strong high-frequency response.
That’s why reviews should be treated as guidance rather than absolute rules.
Whenever possible, listen to real recordings made with the microphone you’re considering. Also, remember that microphone placement can make a major difference.
A microphone positioned slightly off-axis can sometimes reduce harsh sounds. Moving closer can increase the proximity effect on many directional microphones, which may make a voice sound fuller.
In other words, technique can be just as important as the equipment itself.
Microphone polar patterns
Another useful concept is the microphone’s polar pattern. This describes the directions from which a microphone is most sensitive to sound.
Common patterns include:
| Polar Pattern | General Use |
|---|---|
| Cardioid | Solo speech and front-facing recording |
| Omnidirectional | Sound from many directions |
| Bidirectional | Interviews with speakers on opposite sides |
| Supercardioid | Focused directional recording |
| Hypercardioid | Narrower directional pickup |
A cardioid microphone is popular for many spoken-word applications because it primarily focuses on sound coming from the front.
However, the best pattern depends on the room, speakers, and recording style.
Microphone placement matters
Even expensive podcast equipment can’t compensate for poor microphone placement.
A microphone should generally be positioned so the speaker can talk naturally without constantly moving toward and away from it.
Distance also affects the sound.
Moving a microphone closer can make the voice sound more intimate and may increase bass response with some microphones. Moving it farther away can reduce that effect but may allow more room sound into the recording.
A good starting point is to position the microphone close enough for a strong, clear signal while avoiding excessive breathing and plosive sounds.
Then make a short test recording.
Listen.
Adjust.
Record again.
That’s often the easiest way to find the right position.
Gain and recording levels
Gain is another important concept for anyone using podcast equipment.
The microphone produces a relatively small electrical signal. A preamp increases that signal to a usable recording level.
If the gain is too low, the recording may be unnecessarily quiet. If it’s too high, the signal can clip and become distorted.
Digital clipping is particularly problematic because the distorted portions may not be recoverable through normal editing.
A good practice is to leave enough headroom rather than trying to record as loudly as possible.
Modern editing software can increase overall loudness later, but severe clipping is much harder to repair.
Understanding audio formats
Podcast creators may encounter several audio formats.
WAV
WAV files are commonly used for high-quality production and editing. They can be relatively large but preserve detailed audio information.
MP3
MP3 files use compression and are much smaller, making them practical for podcast distribution.
AAC
AAC is another compressed audio format that can provide efficient quality at a reasonable file size.
The best format depends on where the recording will be used. Many creators keep high-quality original recordings for editing and create compressed versions for publishing.
Sample rate and bit depth
Two technical terms often appear when discussing podcast equipment and recording software: sample rate and bit depth.
Sample rate refers to how many times per second an audio signal is sampled during digital conversion.
Bit depth relates to the amount of information used to represent the amplitude of each sample.
Beginners don’t need to become audio engineers overnight. The most important thing is to choose sensible settings and keep them consistent throughout a project.
For many spoken-word podcasts, standard production settings are more than sufficient.
Recording in a quiet room
A quiet room can improve a recording dramatically.
Before recording, listen carefully to the environment. You might notice sounds that seemed invisible during normal conversation.
Common sources include:
- Air conditioners
- Ceiling fans
- Refrigerators
- Computer fans
- Traffic
- Construction
- Pets
- Door movement
- Keyboard clicks
Some noise can be removed during editing, but prevention is usually better than repair.
If possible, record during a quieter time of day and switch off unnecessary noise sources.
Acoustic reflections and echo
Echo can make speech difficult to understand. Large empty rooms with hard surfaces tend to create more reflections.
A bedroom or office with furniture, curtains, carpets, and bookshelves may be easier to manage than a completely empty room.
When improving acoustics, don’t simply cover every wall with foam. Think about where sound is reflecting and how the speaker and microphone are positioned.
Strategic acoustic treatment can be more useful than randomly adding materials.
Podcast equipment for remote interviews
Remote interviews have become an important part of modern podcasting.
Instead of meeting in one studio, the host and guest can participate from different locations.
The challenge is that internet-based conversations can introduce:
- Connection problems
- Compression artifacts
- Delays
- Background noise
- Different microphone qualities
- Uneven volume
Whenever possible, each participant should use a dedicated microphone and headphones.
Recording separate local tracks can also provide greater control during editing if the recording platform supports it.
Backup recording strategies
Imagine conducting a fantastic interview and discovering afterward that the recording wasn’t saved properly.
Ouch!
That’s why backups matter.
Creators can reduce risk by maintaining multiple copies of important recordings.
A practical approach might include:
- Original recording
- Edited project file
- Exported final version
- Backup on external storage
- Additional backup through a reliable cloud service
For particularly important interviews, some creators also use a secondary recording device.
The exact workflow depends on the production environment, but the principle is simple: don’t keep the only copy of valuable audio in one place.
Podcast equipment for video podcasts
The growth of video podcasts has changed equipment requirements.
A video podcast may require:
- Camera
- Microphone
- Audio interface
- Headphones
- Lighting
- Tripod
- Memory cards
- Computer
- Video-editing software
Even in a video podcast, audio quality remains extremely important.
Viewers may tolerate an imperfect camera angle, but poor audio can make a program uncomfortable to watch.
For that reason, creators should generally prioritize clear speech before buying complicated visual accessories.
Lighting for video podcasts
Lighting doesn’t directly belong to audio podcast equipment, but it’s important for creators who publish video versions.
Good lighting helps the camera capture a clean and consistent image.
A basic setup might use a key light positioned in front of the speaker and slightly to one side. Additional lighting can be added when needed.
Natural window light can also work, but it changes throughout the day. Artificial lighting provides more consistency.
Again, you don’t need a television studio to begin. A simple, controlled setup can look perfectly professional.
Recording multiple microphones
When two or more people are recording, each speaker ideally has an individual microphone.
This gives the editor greater control over each voice.
Separate tracks make it easier to:
- Adjust individual volume
- Remove isolated noise
- Edit interruptions
- Apply different processing
- Balance speakers
- Repair certain mistakes
A mixer or multi-input audio interface can help manage several microphones.
Before recording, label the tracks clearly. It sounds like a tiny detail, but it can save a lot of editing time later.
Headphone monitoring techniques
Wearing headphones while recording allows you to hear problems immediately.
However, headphone volume shouldn’t be excessively loud. A comfortable monitoring level is safer and makes it easier to judge the recording naturally.
Listen for:
- Background hum
- Distortion
- Clicking
- Popping
- Excessive breathing
- Room echo
- Uneven volume
If something sounds wrong, stop and fix it before continuing.
Ten seconds of testing can save an hour of editing.
Digital audio processing
After recording, creators often use software to improve consistency and clarity.
Common processing tools include:
Equalization
EQ adjusts different frequency ranges.
It can help shape the overall character of a voice and reduce unwanted frequencies.
Compression
Compression reduces the difference between louder and quieter parts of a recording.
Used carefully, it can make speech more consistent.
Noise reduction
Noise-reduction tools can sometimes reduce steady background sounds.
However, aggressive processing can damage voice quality. Less is often more.
Limiting
A limiter can help prevent sudden peaks from exceeding a chosen level.
These tools can be powerful, but beginners should learn them gradually.
Editing a podcast efficiently
Editing can become one of the longest parts of podcast production.
A good workflow starts with organization.
Keep files clearly labeled. Separate raw recordings from edited projects and final exports.
During editing, creators may remove:
- Long pauses
- Major mistakes
- Repeated statements
- Technical problems
- Unwanted background sounds
But don’t remove every natural pause. Conversations need breathing room.
Over-editing can make a podcast sound artificial.
The aim is to improve the listening experience while preserving the natural personality of the speakers.
Music and sound effects
Some podcasts use intro music, transitions, or sound effects.
These elements can add personality, but they should support the content rather than overpower it.
Music should be properly licensed or otherwise legally usable. Creators shouldn’t simply download a popular song and place it underneath an episode.
Using royalty-free or properly licensed music can reduce copyright problems.
Sound effects should also be used thoughtfully.
Sometimes, silence is more effective than another sound.
Copyright and podcast equipment
Equipment doesn’t eliminate copyright responsibilities.
A podcast may contain music, photographs, video clips, recordings, quotations, or other material protected by intellectual-property laws.
Creators should understand the rights associated with anything they publish.
When in doubt, use original material, properly licensed assets, or material that is clearly available for the intended use.
Copyright rules can vary by country and situation, so important legal questions should be checked with an appropriate legal or official source.
Cleaning and maintaining your podcast equipment
Good maintenance can protect your investment.
Microphones should be handled carefully. Cables should be stored without extreme bends. Headphones should be kept clean and protected from moisture.
Electronic devices should have enough ventilation and shouldn’t be exposed to liquids.
A simple maintenance checklist can include:
- Inspect cables
- Clean equipment carefully
- Check microphone mounts
- Test connections
- Update recording software when appropriate
- Back up important files
- Replace damaged accessories
A little care goes a long way.
Podcast equipment checklist before recording
A pre-recording checklist can prevent many problems.
Before pressing the record button, check:
- Microphone connected
- Correct input selected
- Headphones working
- Recording software ready
- Storage space available
- Microphone positioned correctly
- Background noise minimized
- Phone notifications disabled
- Guest informed about microphone technique
- Backup recording prepared if necessary
Then make a short test recording.
Listen to it before beginning the main conversation.
This simple habit is one of the most useful practices a new podcaster can develop.
A practical upgrade path for creators
You don’t have to buy everything at once.
A sensible upgrade path could look like this:
| Stage | Main Focus | Typical Equipment |
|---|---|---|
| Beginner | Learn recording | USB microphone, headphones, computer |
| Developing | Improve consistency | Boom arm, pop filter, better room control |
| Intermediate | Add guests | XLR microphones, audio interface |
| Advanced | Improve production | Acoustic treatment, multiple inputs, better monitoring |
| Professional | Build workflow | Dedicated studio, backup systems, advanced production tools |
The exact path will vary from creator to creator.
The important point is to upgrade according to your actual needs.
How much should you spend on podcast equipment?
There’s no universal budget.
A beginner can start with relatively affordable equipment and improve over time. A professional production company may spend significantly more because it has different requirements.
Before purchasing anything, ask:
What problem will this equipment solve?
If you don’t have a clear answer, you may not need the product yet.
For example, if your microphone already produces clean audio and your room is quiet, buying another microphone may provide little practical improvement.
On the other hand, if you’re adding three guests, a multi-input interface may solve a real problem.
Smart spending is about matching equipment to the workflow.
Common myths about podcast equipment
There are several myths that can confuse beginners.
Myth: Expensive microphones automatically sound professional
Not necessarily. Room acoustics, technique, placement, and processing matter too.
Myth: You need a studio immediately
You can start from a carefully chosen room at home.
Myth: More equipment means better audio
Extra equipment can actually make a setup more complicated.
Myth: Editing can fix everything
Severe distortion, clipping, and poor recordings can be difficult or impossible to repair completely.
Myth: Every podcaster needs an audio interface
USB microphones can provide a simpler solution for many solo creators.
Understanding these myths can help beginners make more informed choices.
The human side of podcast production
Technology is important, but podcasting isn’t only about machines.
A successful recording also depends on communication.
Hosts need to ask clear questions. Guests need to feel comfortable. Everyone should understand the recording process.
A good microphone can’t create a good conversation by itself.
The best podcast equipment supports the people behind the microphone rather than becoming the main attraction.
Final thoughts on podcast equipment
Building a podcast setup is a journey rather than a one-time purchase. As creators gain experience, they learn more about microphones, acoustics, recording levels, editing, interviews, and production.
The smartest approach is to start with the essentials, practice regularly, and solve problems one at a time. A quiet room and good technique can often produce better results than a desk full of expensive devices.
Whether you’re planning a solo show, an interview program, a video podcast, or a professional production, the right podcast equipment can make recording easier and more reliable. Most importantly, choose tools that match your format, environment, experience, and goals.
With patience, careful preparation, and practical podcast equipment, almost anyone can build a clear, enjoyable, and trustworthy podcasting workflow.
Discover more insightful articles, helpful updates, and engaging stories on Leo ART New, and stay connected with the latest information. For more details, Contact Us.